Get ready to unleash your creativity and transform ordinary objects into extraordinary works of art! Paper mache, a versatile and eco-friendly craft technique, has been a favorite among artists, DIY enthusiasts, and educators for decades. In this article, we’ll explore 18 creative paper mache recipes that will inspire you to create unique and imaginative projects.
From classic designs to innovative twists, our list includes a variety of techniques and ideas to suit every skill level and interest. Whether you’re looking to craft decorative vases, colorful ornaments, or even wearable jewelry, our collection of paper mache recipes has something for everyone.
So, let’s dive into the world of paper mache and discover new ways to express your creativity!
Classic Flour and Water Paper Mache Paste
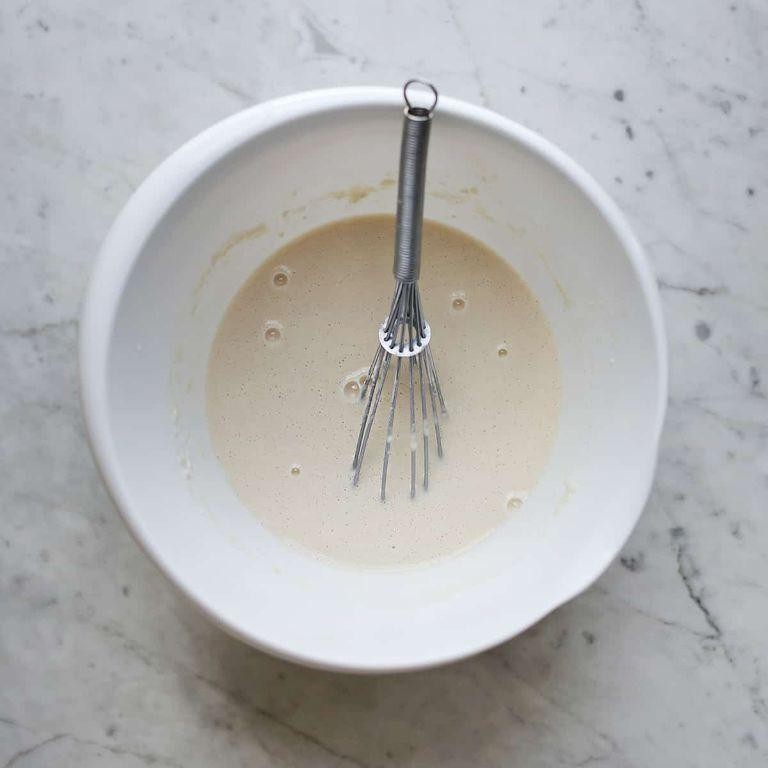
Classic Flour and Water Paper Mache Paste Recipe
This simple and versatile paste is a staple for many paper mache projects, from decorative boxes to sculptures and masks. With just two ingredients and no cooking required, you can get creative and crafty in no time!
Ingredients:
– 2 tablespoons all-purpose flour
– 1 cup water
Instructions:
1. In a small bowl, whisk together the flour and water until smooth and free of lumps.
2. Continue whisking until the mixture thickens to your desired consistency for paper mache work.
3. Use immediately or store in an airtight container at room temperature for up to 24 hours.
Cooking Time:
None! This recipe is ready when you are, straight from the bowl.
Glue-Based Paper Mache for Stronger Creations
Create robust and durable paper mache art pieces using this simple recipe that combines the power of glue with the flexibility of paper. This method is perfect for making unique decorative items, sculptures, or even functional objects.
Ingredients:
– 2 tablespoons white glue (PVA)
– 1 tablespoon water
– 1 cup shredded newspaper or paper strips
– Optional: decorative materials like glitter, paint, or fabric
Instructions:
1. In a bowl, mix together the glue and water until well combined.
2. Tear the newspaper into strips and soak them in the glue mixture for at least 10 minutes.
3. Apply the wet paper strips to your desired surface, overlapping them slightly as you go.
4. Allow each layer to dry completely before adding additional layers or finishing with a coat of varnish.
5. Repeat steps 2-4 until you achieve the desired thickness and shape.
Cooking Time: None required! This recipe is a drying process only.
Cornstarch Paper Mache for Smooth Finishes
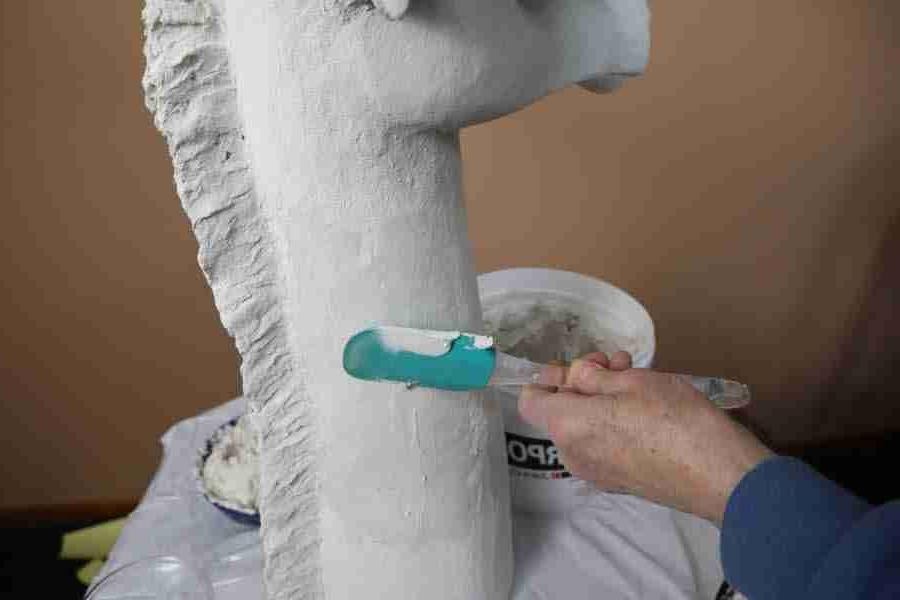
Create a durable and smooth finish on your paper mache projects using this simple recipe. This cornstarch-based mixture is easy to apply and dries quickly, making it perfect for art projects, furniture restoration, and more.
Ingredients:
– 2 tablespoons cornstarch
– 1 cup water
– 1/4 teaspoon white glue (optional)
Instructions:
1. In a small bowl, mix together the cornstarch and water until smooth and free of lumps.
2. If desired, add the white glue to the mixture and stir well.
3. Apply the mixture to your paper mache project using a brush or applicator, working in small sections.
4. Allow the mixture to dry completely before sanding for a smooth finish.
Cooking Time: None (drying time: 15-30 minutes)
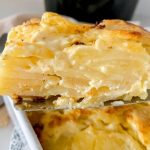
Newspaper Strip Paper Mache Bowl
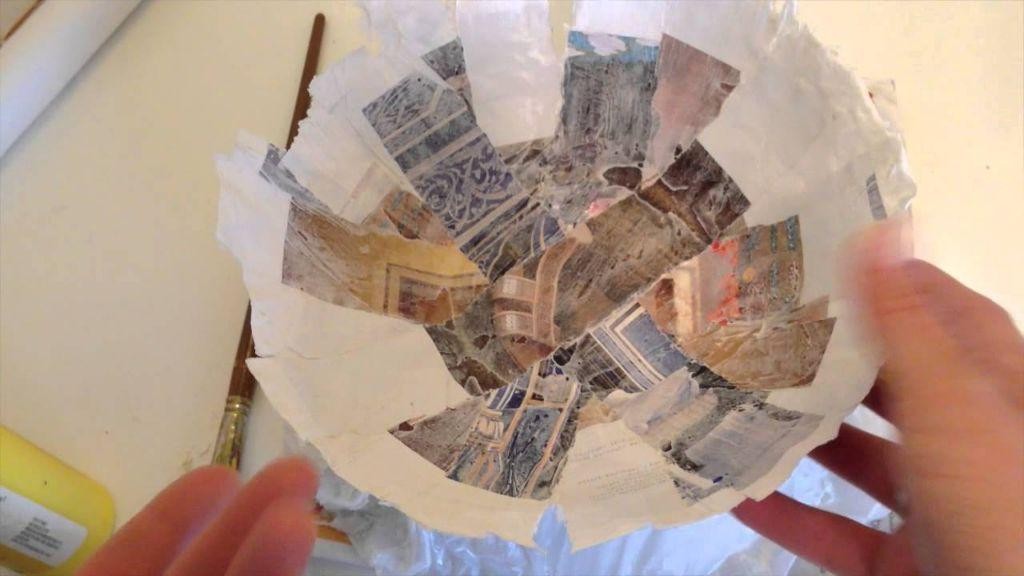
Transform old newspapers into a beautiful paper mache bowl using this simple recipe. With just a few household items, you’ll have a one-of-a-kind decorative piece to treasure.
Ingredients:
– Old newspaper strips
– Water
– White glue (such as PVA)
– Balloons or forms to shape the bowl
– Scissors
– Optional: decorative paint or varnish
Instructions:
1. Cut newspaper strips into 1-inch wide pieces.
2. Mix 1 part white glue with 2 parts water in a bowl.
3. Dip each newspaper strip into the mixture, coating both sides evenly.
4. Wrap the coated newspaper strip around a balloon or form to shape your bowl. Overlap the strips as you go, applying gentle pressure to adhere them together.
5. Allow the paper mache to dry completely, which may take several hours or overnight.
6. Pop the balloon or remove the form to reveal your unique paper mache bowl.
Cooking Time: None needed! Just allow time for drying and shaping.
Paper Mache Pinata with Festive Colors

Bring joy and excitement to your party with this colorful paper mache pinata recipe! With a few simple ingredients and steps, you’ll create a festive centerpiece that’s sure to delight.
Ingredients:
– 2 cups of water
– 1 cup of flour
– 1/2 cup of white glue
– 1 tablespoon of glycerin (optional)
– Food coloring (red, green, yellow, blue)
– Newspaper strips or paper strips
– Scissors
– A balloon or shape to serve as the pinata’s base
Instructions:
1. Mix together water, flour, and glue until smooth.
2. Add a few drops of food coloring to tint the mixture.
3. Tear newspaper strips into 1-inch wide strips.
4. Dip each strip into the colored mixture, coating both sides evenly.
5. Wrap the strips around the balloon or shape, overlapping them slightly as you go.
6. Allow the pinata to dry completely (about 24 hours).
7. Once dry, pop the balloon and remove it from the inside of the pinata.
Cooking Time: None
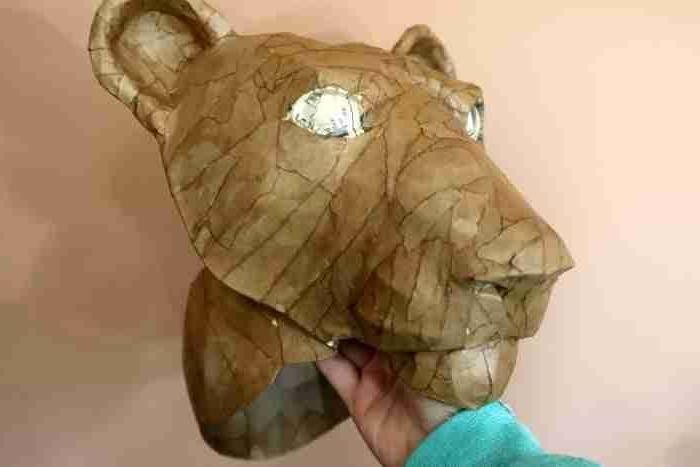
Paper Mache Animal Masks for Kids
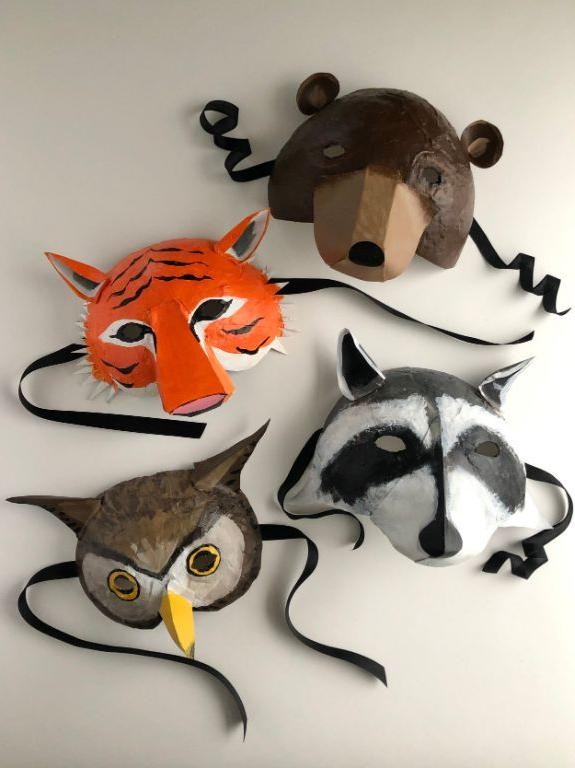
Get creative with your kids and make their own unique animal masks using paper mache! This fun and easy project is perfect for a rainy day or a fun activity to take on-the-go.
Ingredients:
– 2 cups of water
– 1 cup of flour
– 2 tablespoons of white glue
– Newspaper strips (or construction paper)
– Scissors
– A balloon or paper plate (for the mask shape)
– Paint and markers (optional)
Instructions:
1. Mix together the water, flour, and glue to create the paper mache paste.
2. Tear newspaper strips into small pieces and soak them in the mixture for about 5 minutes.
3. Wrap the soaked newspaper strips around the balloon or paper plate to form the mask shape. Make sure to cover the entire surface.
4. Let it dry completely (this may take a few hours depending on the humidity).
5. Once dry, pop the balloon or remove the paper plate and trim any excess paper mache.
6. Use paint and markers to decorate your animal mask!
7. Add some elastic or string to create a comfortable fit for your child’s face.
Cooking Time: None! This project is ready in just a few hours (or less, depending on drying time).
Lightweight Paper Mache Balloons

Create unique and lightweight paper mache balloons perfect for parties or decorative purposes. This recipe uses a simple mixture of paper pulp, water, and glue to create durable yet fragile-looking balloons.
Ingredients:
– 2 cups of torn newspaper or paper pulp
– 1 cup of warm water
– 2 tablespoons of white glue
– Balloon mold (latex or Mylar)
– Optional: paint, markers, or other decorations
Instructions:
1. In a large bowl, mix together the paper pulp and warm water until well combined.
2. Add the white glue to the mixture and stir until smooth.
3. Pour the mixture into the balloon mold, making sure to cover the entire surface.
4. Allow the mixture to dry completely, which may take several hours or overnight.
5. Once dry, carefully remove the balloon from the mold and trim any excess paper.
6. If desired, decorate with paint, markers, or other materials.
Cooking Time: None (paper mache process only)
Paper Mache Decorative Vases
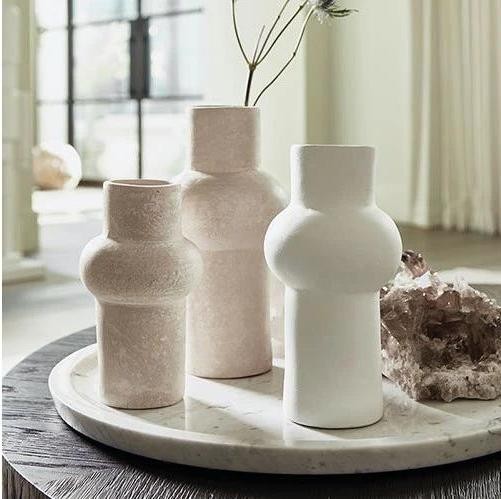
Create unique and eco-friendly decorative vases using paper mache and natural materials. This guide will walk you through the process of creating beautiful, one-of-a-kind vases perfect for home decor or gift-giving.
Ingredients:
– 2 cups water
– 1 cup white glue (PVA)
– 4-6 sheets of newspaper, torn into small pieces
– 1 tablespoon cornstarch
– 1 teaspoon baking soda
– Decorative items (optional): paint, markers, glitter, etc.
– Balloon or vase shape to mold the paper mache
Instructions:
1. Mix 2 cups water with 1 cup white glue in a bowl until well combined.
2. Add 4-6 sheets of torn newspaper to the mixture and stir until fully saturated.
3. Apply the paper mache mixture to your chosen balloon or vase shape, layer by layer, allowing each layer to dry before adding more.
4. Once the final layer is dry (about 24 hours), pop the balloon or remove the vase shape from the paper mache.
5. Use a wet cloth to smooth out any rough edges and add a coat of varnish for protection.
6. Get creative with decorative items like paint, markers, or glitter to personalize your finished vases.
Cooking Time: N/A (this is a DIY project, not cooking!)
Paper Mache Sculpture Armature Techniques

Create a sturdy base for your paper mache sculpture with this simple armature technique. By using wire and cardboard, you’ll be able to shape and hold your desired form.
Ingredients:
– 1 roll of aluminum or copper wire (20-22 gauge)
– 1 piece of thick cardboard or cardstock
– Scissors
– Glue or hot glue gun
Instructions:
1. Cut a piece of cardboard into the desired shape for your sculpture’s armature.
2. Wrap the wire around the cardboard, starting from one end and working your way around to the other.
3. Make sure to leave small gaps between each wrap to allow for easy shaping.
4. Use scissors or a craft knife to trim any excess wire as you go.
5. Once complete, use glue or a hot glue gun to attach any loose ends of wire.
Cooking Time: N/A (this is a crafting process!)
Paper Mache Halloween Decorations
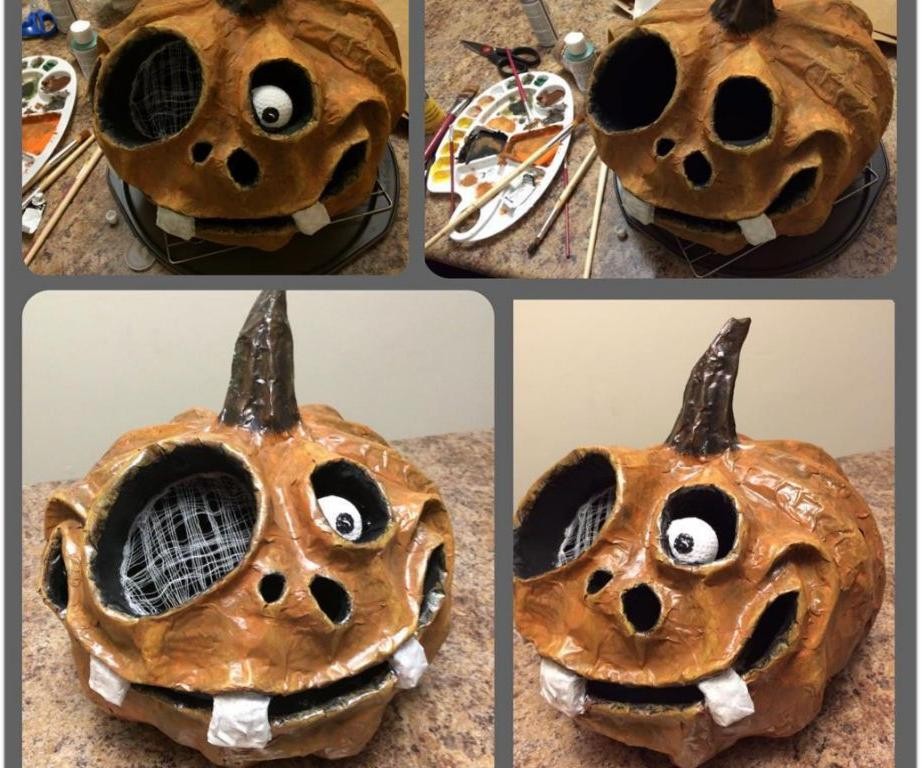
Transform your home into a haunted haven with these eerie paper mache decorations. With just a few simple ingredients and some creative flair, you’ll be brewing up a spooky atmosphere in no time.
Ingredients:
– 2 cups of water
– 1 cup of flour
– 1/2 cup of white glue
– 1 tablespoon of borax
– Newspaper or paper strips (for decoration)
– Scissors
– Paint and decorations (optional)
Instructions:
1. In a large bowl, mix together the water, flour, and glue until smooth.
2. Add the borax to the mixture and stir well.
3. Tear newspaper into strips and dip them into the mixture.
4. Wrap the strips around a balloon or shape of your choice to create the desired form.
5. Allow the paper mache to dry completely (this may take several hours).
6. Once dry, pop the balloon or remove the shape from the paper mache.
7. Paint and decorate as desired.
Cooking Time: None! This recipe is a craft project that dries over time.
Paper Mache Easter Eggs with Patterns
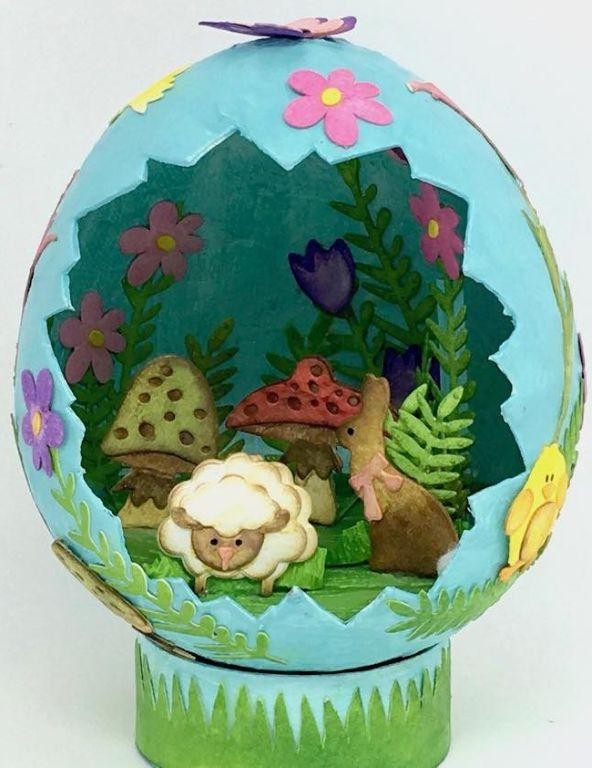
Add a unique twist to your Easter egg decorating this year by creating paper mache eggs with fun patterns! With just a few simple ingredients, you can create these one-of-a-kind decorations.
Ingredients:
– 2-3 cups water
– 1 cup white glue
– 1/2 cup shredded newspaper or paper strips
– Food coloring (optional)
– Pattern materials (e.g. fabric scraps, tissue paper, stickers)
Instructions:
1. Mix together 2 cups of water and 1 cup of white glue in a bowl.
2. Tear the shredded newspaper into small pieces and add to the mixture, stirring until well combined.
3. Knead the mixture with your hands until it forms a sticky dough.
4. Shape the dough into egg shapes and let dry for at least 24 hours.
5. Once dry, decorate your eggs by wrapping pattern materials around them or using paint and markers.
6. Seal with a clear coat of varnish to protect the paper mache.
Cooking Time: None! These are decorations, not edible treats!
Paper Mache Globe for Geography Projects
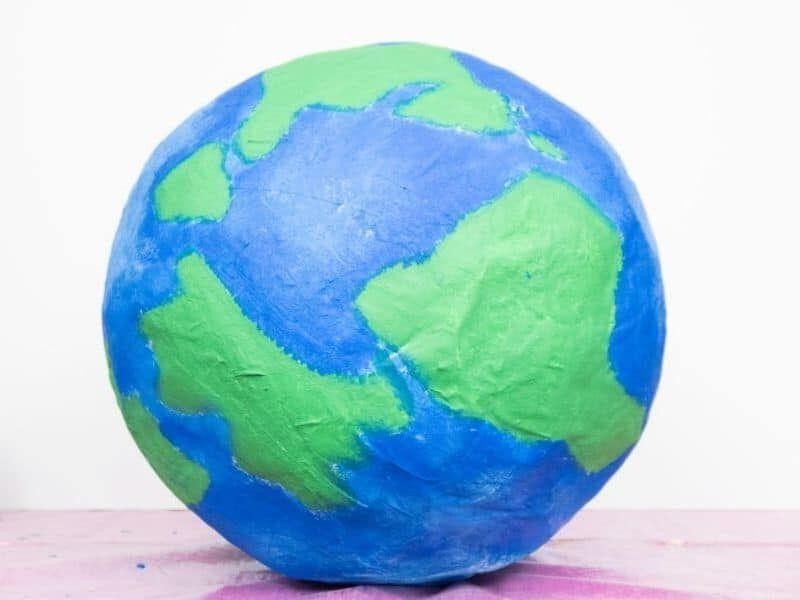
Bring your geography projects to life with this fun and creative paper mache globe recipe! With just a few simple ingredients, you can create a unique and engaging visual aid for learning about different countries and cultures.
Ingredients:
– 1 balloon (various sizes work well)
– 2 cups of water
– 1 cup of white glue
– 1/2 cup of flour
– Optional: paint, markers, or other decorations
Instructions:
1. Inflate the balloon to the desired size for your globe.
2. In a large bowl, mix together the water and glue until well combined.
3. Add the flour to the mixture and stir until smooth.
4. Apply the paper mache mixture to the balloon, covering it evenly.
5. Repeat steps 3-4 until you have reached the desired thickness for your globe.
6. Allow the globe to dry completely (this may take several hours or overnight).
7. Once dry, pop the balloon and remove it from the inside of the globe.
8. Paint, mark, or decorate the globe as desired.
Cooking Time:
– Drying time: 2-4 hours
Paper Mache Volcano for Science Fair
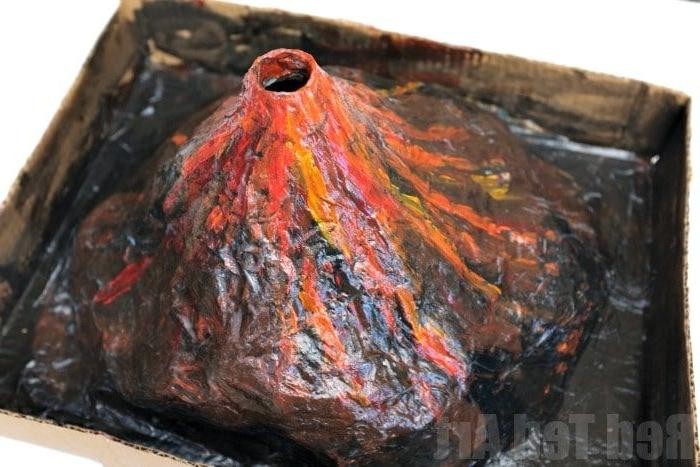
Create a realistic volcanic eruption that’s sure to impress at your science fair! This classic demonstration of chemical reactions and geology is easy to make and fun to watch.
Ingredients:
– 2 cups of all-purpose flour
– 1 cup of water
– 1/2 cup of white glue
– 1/4 teaspoon of borax
– 1 tablespoon of dish soap
– Baking soda (for the “volcanic ash” effect)
– Food coloring (optional)
Instructions:
1. Mix together flour and water in a bowl until it forms a thick paste.
2. Add white glue and mix well.
3. In another bowl, mix 1/4 teaspoon of borax with 1 tablespoon of warm water to dissolve.
4. Slowly add the borax mixture to the paper mache mixture, stirring constantly.
5. Pour the mixture into a plastic bottle or container to create the “volcano” shape.
6. Add a few drops of dish soap and mix well.
7. Create the “volcanic ash” effect by sprinkling baking soda around the volcano.
8. For added realism, add a few drops of food coloring to the mixture for a grayish color.
Cooking Time:
None! This is a demonstration project that requires no cooking or heat.
Paper Mache Jewelry Box with Embellishments
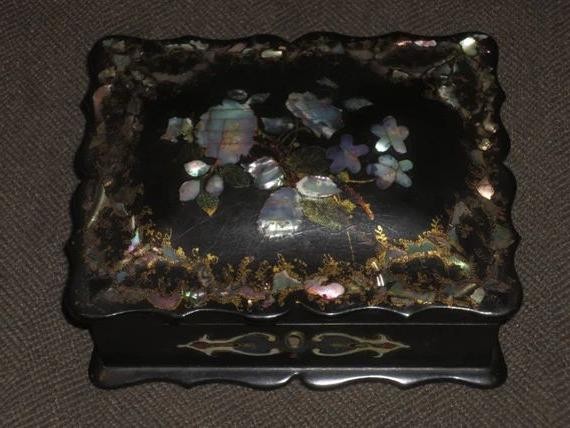
Transform plain paper mache into a beautiful jewelry box adorned with embellishments. This project is perfect for crafty enthusiasts looking to add a personal touch to their home decor.
Ingredients:
– 2 cups all-purpose flour
– 1 cup water
– 1 tablespoon white glue
– 1 teaspoon glycerin (optional)
– Jewelry box template or shape of your choice
– Paper mache paste (homemade or store-bought)
– Embellishments: paint, markers, stickers, beads, sequins, etc.
– Clear varnish or sealant
Instructions:
1. Mix flour, water, glue, and glycerin (if using) to create the paper mache paste.
2. Cut out your template or shape from cardboard or paper.
3. Apply a thin layer of paper mache paste to the template and cover with torn paper strips.
4. Allow it to dry completely.
5. Sand and paint the box as desired.
6. Add embellishments using glue, varnish, or other adhesives.
7. Seal the box with clear varnish or sealant.
Cooking Time: None (this is a craft project!)
Paper Mache Wall Art Panels
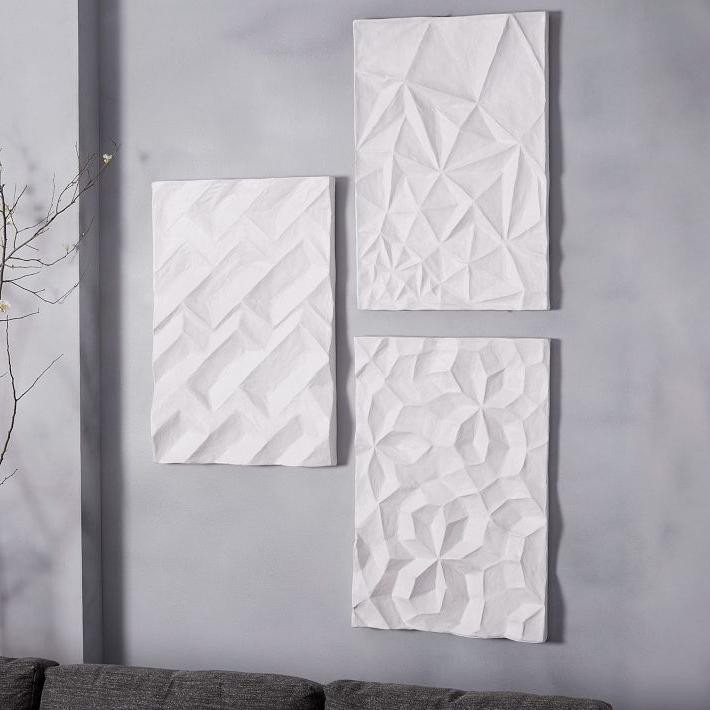
Create unique and eco-friendly wall art with this simple paper mache recipe. Combine recycled paper, glue, and a few basic materials to create one-of-a-kind panels that add texture and visual interest to any room.
Ingredients:
– 2 cups shredded newspaper or cardboard
– 1 cup water
– 2 tablespoons white glue (such as Elmer’s)
– 1 tablespoon glycerin (optional)
– Decorative items for embellishment (e.g., paint, markers, stickers)
Instructions:
1. In a large bowl, mix 2 cups of shredded paper with 1 cup of water until well combined.
2. Add the glue and glycerin (if using) to the mixture and stir until smooth.
3. Apply the paper mache mixture to a panel or board, spreading it evenly to cover the surface.
4. Allow the first layer to dry completely before applying additional layers.
5. Repeat steps 2-4 until you achieve the desired thickness and texture.
6. Once complete, allow the panels to fully dry (this may take several hours or overnight).
7. Embellish your panels with decorative items of your choice.
Cooking Time: None (this is a craft project!)
Paper Mache Fairy Houses for Gardens
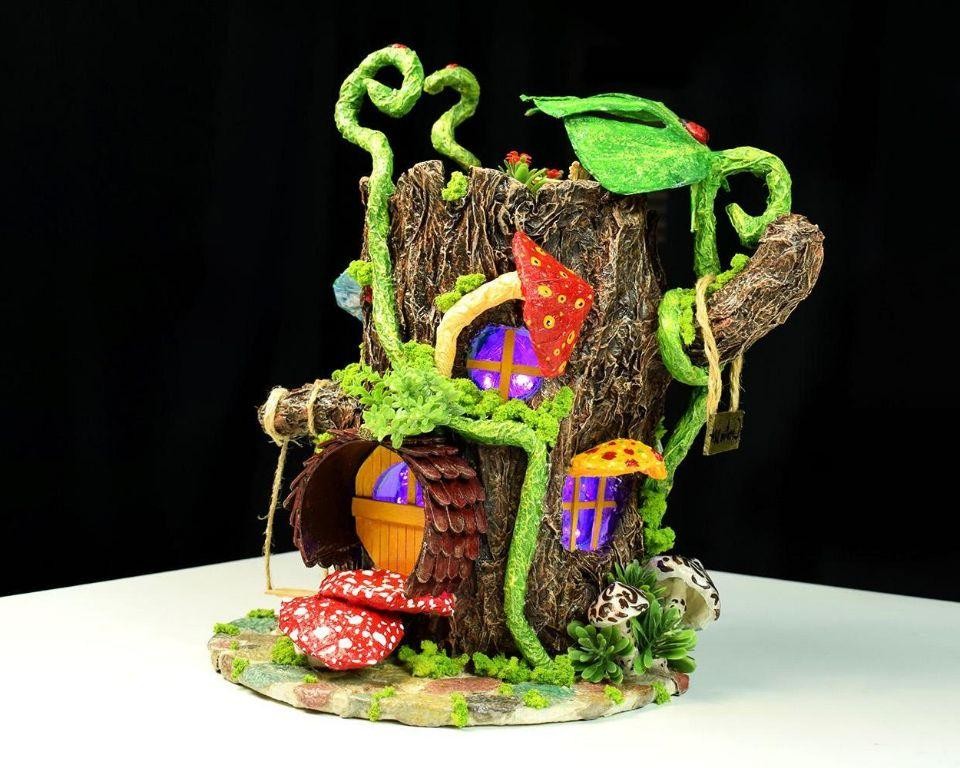
Bring whimsy and wonder to your garden with these charming paper mache fairy houses. With just a few simple ingredients, you can create your own miniature abodes for the fairies that live among the flowers.
Ingredients:
– 2 cups all-purpose flour
– 1 cup water
– 1/4 cup white glue
– 1 tablespoon glycerin (optional)
– Scissors
– Toothpicks
– Twine or yarn
– Small rocks, shells, or pebbles (for decoration)
Instructions:
1. In a large bowl, mix together flour and water until smooth.
2. Add the white glue and glycerin (if using) to the mixture. Stir well.
3. Cut out small house shapes from newspaper or paper strips.
4. Dip each shape into the mixture, coating both sides evenly.
5. Place the coated shapes onto a flat surface, allowing excess mixture to drip off.
6. Allow the houses to dry completely, which may take several hours or overnight.
7. Use toothpicks and twine or yarn to create doors, windows, and roof details.
8. Decorate with small rocks, shells, or pebbles.
Cooking Time: None (this recipe is a craft project)
Paper Mache Christmas Ornaments
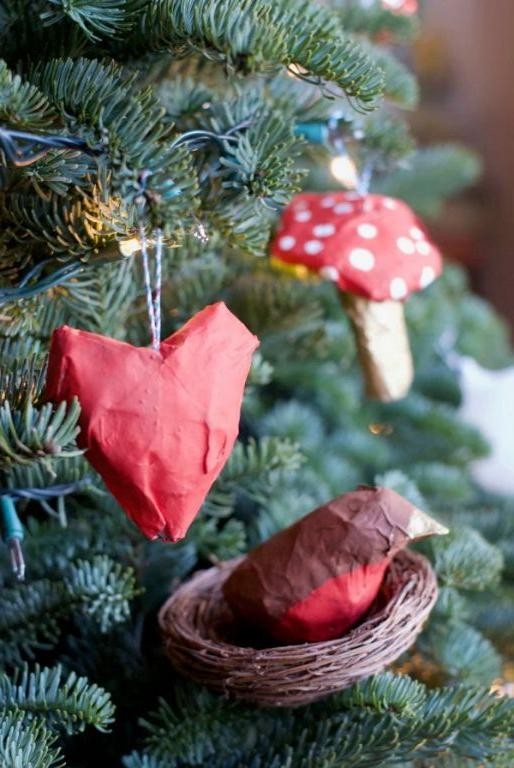
Create Unique Paper Mache Christmas Ornaments
Add a touch of creativity to your holiday decor with these paper mache ornaments. With just a few simple ingredients and some patience, you can create one-of-a-kind decorations that will be treasured for years to come.
Ingredients:
– 2 cups water
– 1 cup white glue (PVA)
– 1/2 cup shredded newspaper or paper strips
– 1/4 cup decorative paper or tissue paper (optional)
– Glitter, paint, or other embellishments (optional)
Instructions:
1. Mix the water and glue in a bowl until well combined.
2. Add the shredded newspaper or paper strips to the mixture and stir until it forms a thick paste.
3. Cut out shapes from the decorative paper or tissue paper for added color and texture.
4. Use the papier-mâché mixture to cover the ornaments, starting with the center and working your way outward.
5. Allow each layer to dry completely before adding more (this may take several hours).
6. Once the ornaments are dry, add any embellishments such as glitter or paint.
Cooking Time: None!
Paper Mache Dinosaur Fossils for Play

Create realistic dinosaur fossils with a fun and educational twist! This recipe is perfect for kids’ imaginative play, allowing them to become paleontologists and uncover hidden treasures.
Ingredients:
– 2 cups of white glue
– 1 cup of water
– 1 tablespoon of glycerin (optional)
– Dinosaur-shaped cardboard or foam models (various sizes)
– Brown paper strips or newspaper
– Scissors
– Paint (acrylic or tempera) and a paintbrush
Instructions:
1. Mix the glue and water in a bowl until well combined.
2. Add glycerin if desired to help prevent the mixture from drying out too quickly.
3. Cut the brown paper strips into 1-2 inch pieces.
4. Dip each strip into the glue mixture, coating both sides evenly.
5. Wrap the coated strips around the dinosaur model, overlapping them slightly as you go.
6. Allow the fossils to dry completely (this may take several hours or overnight).
7. Paint the fossils with acrylic or tempera paint for a realistic appearance.
Cooking Time: None! This recipe is ready when the glue mixture dries and the fossils are set.
Summary
Get creative with paper mache! This ancient craft has been revitalized with new recipes and techniques. From classic flour and water paste to glue-based and cornstarch mixtures, discover the perfect formula for your project. Make unique bowls, pinatas, animal masks, balloons, vases, sculptures, and more. Perfect for kids’ projects or adult crafting, paper mache can be used for decorations, gifts, and even functional items like jewelry boxes. With these 18 creative recipes, you’ll never run out of ideas to try your hand at this fun and versatile craft.